Fillet Mulloway

Description


This video explains step-by-step the process of removing both fillets from a mulloway (aka jewfish) with minimal waste, then how to remove the pin bones and skin from the fillet.

Each species is slightly different, however the method often remains the same. If you are new to fishing or have somehow ended up with a whole fresh fish but don’t know what to do with it, follow the steps you see here, pause it if you have to, and with a bit of luck you too will be left with a couple of fresh boneless fillets ready for the pan.


See our other video where we explain how to remove the otoliths (aka jewels) from this fish.


Get Fishing tournament banner for website


Fillet Snapper

Description


This video is part of our educational series on how to fillet various species of Australian fish. It explains step-by-step the process of removing both fillets from a snapper with minimal waste, then how to remove the pin bones and skin from the fillet. Each species is slightly different, however the method often remains the same.

If you are new to fishing or have somehow ended up with a whole fresh fish but don’t know what to do with it, follow the steps you see here, pause it if you have to, and with a bit of luck you too will be left with a couple of fresh boneless fillets ready for the pan.


Get Fishing tournament banner for website


Mediterranean Tuna Pasta

This Mediterranean style tuna dish delivers with strong flavours and is really easy to cook. A small piece of tuna goes a long way in a filling dish like this.


IMG_0535-220x165


Ingredients


½ kilo fresh tuna cut into bite-sized pieces
400g penne pasta
½ cup olive oil
3 cloves finely sliced garlic
1 finely chopped red chilli
6 chopped anchovies
200g cherry tomatoes
2 tablespoons capers
200g pitted black olives (drain well)
¾ cup chopped basil leaves
½ cup rocket & baby spinach mix
Rock salt and cracked black pepper


Instructions


1. Cook the pasta, drain and set aside


2. Preheat fry pan to med-high. Add 1 tablespoon of olive oil and cook tuna to your liking, but not longer than ‘just cooked through’. Remove from fry pan and set aside


IMG_0527-220x165


3. Add the remaining olive oil, garlic, chilli, anchovies, cherry tomatoes, capers and olives. Cook for 5-10 minutes until cherry tomatoes start to soften


IMG_0529-220x165


4. Mix in the cooked pasta, tuna, basil leaves and rocket & baby spinach mix


IMG_0531-220x165


5. Serve seasoned with rock salt and cracked black pepper


Extra notes

  • Can add a few boiled eggs and avocado at the end for extra body and flavour
  • ½ a long red chili or a full small red chili provides sufficient heat

Paternoster Rig Variations

Description


In this video, Che Carson demonstrates how to tie a couple of variations of the popular Paternoster Rig. This extremely versatile fishing rig is used in numerous applications such as deep sea bottom bouncing, beach fishing, fishing from piers, squid fishing, etc.

Paternoster Rigs can be tied comfortably in mono or fluorocarbon leader up to 100lb or so, and are a ‘must know’ rig for any salt water angler. An alternative to using 3-way swivels is to tie dropper loops, however they do not retain the same strength as with using 3-way swivels.


Get Fishing tournament banner for website


Snell Knot – Up Eye Hook

Description


In this video, Che Carson demonstrates the correct method of how to tie a Snell Knot to an up (offset) eye hook. This knot involves tying the knot around the shank of the hook, as opposed to the eye of the hook.

Snelling two hooks together (as demonstrated in this video) enables the perfect presentation of large fleshy baits such as slabs/fillets, whole fish, whole squid, etc. The size of the gap between the hooks is dependent on the size of the bait you wish to use.


Get Fishing tournament banner for website


Snell Knot – Straight Eye Hook

Description


In this video, Che Carson demonstrates the correct method of how to tie a Snell Knot to a straight eye hook. This knot was invented for tying on eyeless hooks, hence it involves tying the knot around the shank of the hook, as opposed to the eye of the hook.

Snelling two hooks together enables the perfect presentation of large fleshy baits such as slabs/fillets, whole fish, whole squid, etc. The size of the gap between the hooks is dependent on the size of the bait you wish to use.


Get Fishing tournament banner for website


Fish N Fool Knot

Description


In this video, Che Carson demonstrates the correct method of how to tie a Fish N Fool Knot. This knot is essentially a Uni Knot tied with the line going through the eye of the hook twice. It is strong, reliable and used to tie terminal connections such as joining mainline to a swivel, leader to hook, lures, etc.

This ‘King of Knots’ took out the title of strongest knot in it’s category in the North American TV show, Knot Wars in 2009, over other renown favourites such as the Trilene Knot and the Palomar Knot. In 2010 it was runner up to the Berkely Braid Knot. The Fish N Fool Knot is easy to tie, even in heavy mono or fluorocarbon lines.


Get Fishing tournament banner for website


Dropper Loop

Description


In this video, Che Carson demonstrates the correct method of how to tie a Dropper Loop. This knot is used to form loops, or droppers, that stand out at right angles from a length of line. Attach hooks to these droppers and you have a Paternoster rig.

Dropper loops can be tied comfortably in mono or fluorocarbon leader up to 100lb or so.


Get Fishing tournament banner for website


Slim Beauty Knot

Description


In this video, Che Carson demonstrates the correct method of how to tie a Slim Beauty Knot. This strong joining knot is used for connecting mainline to leader, particularly line of different diameter and different materials. It’s a relatively easy knot to tie and it’s low profile makes it ideal for casting.


Get Fishing tournament banner for website


Uni Knot

Description


In this video, Che Carson demonstrates the correct method of how to tie a Uni Knot. This very simple knot is strong and reliable and used to tie terminal connections such as joining mainline to a swivel, leader to hook, lures, etc.

When tying with braid do 8 or 9 wraps as opposed to 3 or 4 with mono.


Get Fishing tournament banner for website


GT Knot

Description


In this video, Che Carson demonstrates the correct method of how to tie a GT Knot. This strong joining knot is used for connecting braided mainline to mono or fluorocarbon leader and is ideal for casting.

The beauty of this knot is that the mono tag end faces up the line, and therefore doesn’t catch on it’s way out through the guides.


Get Fishing tournament banner for website


Lefty’s Loop

Description


In this video, Che Carson demonstrates the correct method of how to tie a Lefty’s Loop. This reliable non-slip knot, popularised by fishing legend Lefty Kreh, is used for tying mono or fluorocarbon leader to a lure or fly.

Rather than inhibiting the natural action of the lure by tying a knot directly to the tow point, the Lefty’s Loop knot is positioned back up the leader a couple of centimeters, enabling the lure freedom to move during the retrieve.


Get Fishing tournament banner for website


Thai-style Squid

Bored of egg and breadcrumb calamari rings? Spice things up a little with this punchy little number. It’s tangy, delicious and better for you too.


IMG_0218-220x165


Ingredients


Cleaned squid tubes
400g bag of rocket & baby spinach
3 tablespoons sweet chilli sauce
1 teaspoon soy sauce
2 tablespoons fish sauce
2 tablespoons lime juice
1 ½ tablespoons finely chopped ginger
1-2 tablespoons finely chopped coriander
Olive oil
Limes to serve

Instructions


1. Cut squid tubes down one side and open flat with inside facing up. Score the flesh lightly in a crisscross pattern. Cut into 3cm x 5cm strips


2. Create the marinade by combining sweet chilli sauce, soy sauce, fish sauce, lime juice, ginger and coriander in a glass bowl. Add squid pieces and mix well


IMG_0212-220x165


3. Remove squid from madinade and pour marinade into a small saucepan. Bring to simmering (will later drizzle over cooked squid)


IMG_0216-220x165


4. Preheat barbecue (or quality fry pan) to med-high. Drizzle with olive oil, add squid and cook for 2-3 minutes turning regularly


IMG_0215-220x165


5. Place a large handful of rocket & baby spinach mix onto each plate. Top with squid and drizzle with hot marinade and lime juice


Extra notes

  • For a stronger hit, increase the amount of coriander and sweet chilli sauce
  • If you have time, let the squid pieces soak in the marinade (in the fridge) for an hour or so

Double Uni Knot

Description


In this video, Che Carson demonstrates the correct method of how to tie a Double Uni Knot. This is a very strong and reliable joining knot used to join two sections of line together, for example, topping up the line on a spool, joining mainline to leader, etc.

Suitable for joining two lines of similar diameter or joining a thinner diameter braided mainline to a thicker mono or fluorocarbon leader.


Get Fishing tournament banner for website


Beach Fishing Rigs

Description


In this video, Che Carson demonstrates a couple of methods for tying beach fishing rigs. There are many different rigs to choose from when it comes to beach fishing. These sliding sinker and fixed sinker rigs are a good starting point that will enable you to cover multiple beach fishing scenarios.

Get Fishing tournament banner for website


Bimini Twist

Description


In this video, Che Carson demonstrates the correct method of how to tie a Bimini Twist. This knot is used for creating a double in your mainline that can then be used to connect your leader.


Get Fishing tournament banner for website


Double Loop Clinch Knot aka Trilene Knot

Description


In this video, Che Carson demonstrates the correct method of how to tie a Double Loop Clinch Knot, aka the Trilene Knot. This is a very strong and reliable knot used for terminal connections such as joining mainline to a swivel, leader to hook, lures, etc.

Knot strength in mono is best when tied with 25lb or less, and is renown to retain up to 85-90% line strength. When tying with braid do 8 or 9 wraps up the mainline as opposed to 4 or 5 with mono.


Get Fishing tournament banner for website


Adjustable Snell Knot

Description


In this video, Che Carson demonstrates the correct method of how to tie an Adjustable Snell Knot. This knot is ideal for using different size baits, particularly large fleshy slab/fillet baits. Simply slide the top adjustable hook up or down your leader to suit the size of your bait.


Get Fishing tournament banner for website


Albright Knot

Description


In this video, Australian angler Che Carson demonstrates the correct method of how to tie an Albright Knot. This knot is used for joining mainline to leader. It can either be used for mono to mono or braid to mono connections, mainly the later.


Get Fishing tournament banner for website


Salt & Pepper Squid

Here’s a tasty little treat to satisfy your appetite or accompany a feed of fish. This S & P squid recipe gets its kick from a hint of Chinese five-spice.


IMG_0546-220x165


Ingredients


Cleaned squid tubes (cut into rings or scored strips)
Plain flour
¾ teaspoon salt
½ teaspoon chilli powder
1 teaspoon ground white pepper
1 teaspoon Chinese five-spice
Fresh lemon and Aioli to serve


Instructions


1. Preheat deep fryer to med-hot


2. Combine the flour, salt, chilli powder, pepper, and Chinese five-spice in a freezer bag on a plate. Add the squid and coat


IMG_0538-220x165


3. Cook batches of squid in the deep fryer for 2-3 minutes until the coating turns a crisp golden brown. Drain well on paper towel


IMG_0544-220x165


4. Serve hot with fresh lemon and Aioli


Extra Notes

  • Sweet chilli sauce with a dash of soy is a nice accompaniment
  • Great as a side dish or entree
  • For cleaner hands and less dish washing, mix ingredients in a freezer bag
  • Can also dip the squid in egg before coating
  • Additional seasoning before eating is not required

Panko Breadcrumb Shark

We don’t promote the taking of too many sharks, but if you’re shy of a feed or have one that won’t release, here’s another recipe that’s great for neutralising the strong flavour.


IMG_1978-220x165


Ingredients


Shark cutlets
100g Panko breadcrumbs
2 eggs
Butter
4 Tablespoons cooking oil
1 lemon
Salt to taste

Instructions


1. Preheat large fry pan with 50:50 oil and butter


2. While fry pan is heating up, crack eggs into a bowl and whisk. Pour breadcrumbs into a freezer bag or onto a plate. Dip the cutlets into the egg then coat with breadcrumbs


3. Cook the cutlets on med-high heat until the breadcrumbs are golden brown and cutlets have cooked through


4. Season with salt and drizzle with fresh lemon juice


5. Serve with a side of salad or steamed vegetables


Extra notes

  • Remember to dispatch sharks humanely and immediately after capture. Remove the head, fins, and guts once the shark is dead to help drain the blood and ammonia taste from the flesh
  • Goes well with a side of salad or steamed vegetables

Marinated Gummy Shark

We don’t promote the taking of too many sharks, but if you’re shy of a feed or have one that won’t release, here is a recipe that’s great for neutralising the strong flavour.


IMG_1981-220x165


Ingredients


Gummy Shark cutlets
Soy sauce
Hoisin sauce
Sweet chili sauce
Honey
Garlic, chopped
Cooking oil

Instructions


1. In a large glass or ceramic bowl, mix sauces, garlic and honey. The amount of each sauce is totally up to you depending on personal taste and amount of shark you intend on using. Just make enough marinade to cover shark cutlets in the bowl. A few garlic cloves and a couple of tablespoons of honey are usually adequate.


2. Place marinade in the fridge for half an hour. Use this time to prepare a nice salad or vegetables to accompany the cutlets


3. Heat large fry pan with a couple of tablespoons of oil to med-high


4. Cook the cutlets until the marinade begins to caramelize and the cutlets have cooked through


5. Serve with a side of chips, salad or steamed vegetables


Extra notes

  • Remember to dispatch sharks humanely and immediately after capture. Remove the head, fins, and guts once the shark is dead to help drain the blood and ammonia taste from the flesh
  • It’s best to let the shark cutlets marinade in fridge for at least 30 minutes. However, if you don’t have time it will still taste good
  • This recipe is intended to be pretty simple. Tweak it to your taste, add some extra ingredients and let us know how it goes

Lauren’s Creamy Seafood Pasta

Lauren is a lover of all things food, and lets just say she knows her way around the kitchen. When it comes to seafood dishes, this is up there with her all-time favourites. Enjoy!


IMG_0428-220x165


Ingredients


3 cloves of fresh purple garlic
Green king prawns (can add calamari and fish)
3 tablespoons butter
Chives
¼ cup shaved parmesan cheese
Fresh thickened cream
Salt and pepper
Fresh linguine pasta
1 tablespoon salt for pasta water

Instructions


1. Bring salted water for pasta to the boil


2. Melt butter over medium heat in large sauce pan. Then add garlic and cook for two minutes


IMG_0415-220x165


3. Add prawns and cook until pink


IMG_0418-220x165


4. Add fresh pasta to boiling water. Follow packet for cooking time. Be sure to not overcook!


5. Add cream, plenty of parmesan, chives and salt and pepper to prawns


IMG_0420-220x165


6. Add pasta to prawn and cream mixture


IMG_0421-220x165


7. Serve immediately. Add cracked pepper, more fresh chives and shaved Parmesan on top


Extra notes

  • Also works well with seafood marinara mix
  • Can substitute chives with parsley

Coconut Fish Curry

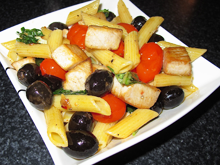
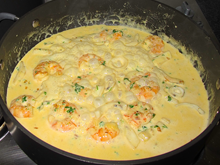
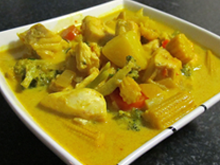
This tasty fish curry is a great heart-warmer for those cold winter nights, or if you’re a curry fanatic it could well be a new regular dish on the menu.


IMG_0211-220x165


Ingredients


Thick, flaky fish pieces/chunks – e.g. coral trout, snapper, emperor, etc.
1 heaped tablespoon of green curry paste
1 can coconut cream
1 can of coconut milk
1 small onion, diced
2 garlic cloves, finely chopped
2 Carrots, chopped
Potato, chopped (same amount as fish)
1 cup broccoli
1 cup cauliflower
½ cup baby corn, chopped
Any other vegetables suitable to curries
Salt to taste


Instructions


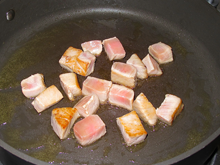
1. Cook onion and garlic until golden brown


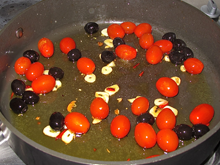
2. Add curry paste and veges and stir for 1-2 minutes


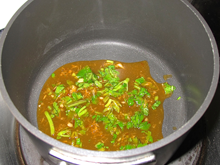
3. Add coconut cream & milk. Bring to the boil, then lower temp to low-med and simmer for 10-15min


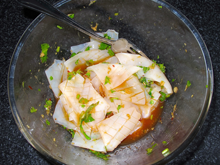
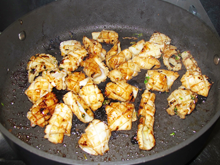
4. When the veges are about 5min from ready, throw in the fish


5. Simmer for a further 5-10min until you think it’s ready


6. Serve it up and let stand for about 5 minutes to cool down before eating


Extra notes

  • Be careful with the curry paste because it takes until almost the end of the dish for the heat to kick in – 1 heaped tablespoon is a good starting point for a mild-med dish
  • Best served by itself but also goes well with rice
  • Use a quality curry paste such as Valcom authentic Thai curry paste (or similar) – available in 210g jars at Woolworths